
Installation
Install and configure TrackEdge in your Unreal Engine project.
Installation
Getting started with TrackEdge only takes a few minutes. Once installed, you'll be ready to send your first analytics event and start recording gameplay sessions.
Requirements
Before installing TrackEdge, make sure you have:
- Unreal Engine 4 or 5+
- A TrackEdge project
- Your Project ID
- Your API Key
You'll receive your Project ID and API Key after creating a project in the TrackEdge Dashboard.
Step 1 - Install the Plugin
Install the TrackEdge plugin into your Unreal Engine project.
Place the plugin inside your project's Plugins folder.
YourProject/
└── Plugins/
    └── TrackEdge/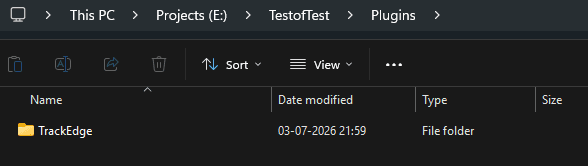
Step 2 - Enable the Plugin
Open your project in Unreal Engine.
Navigate to:
Edit
└── Plugins
    └── TrackEdge
Make sure TrackEdge is enabled. Restart Unreal Engine if prompted.
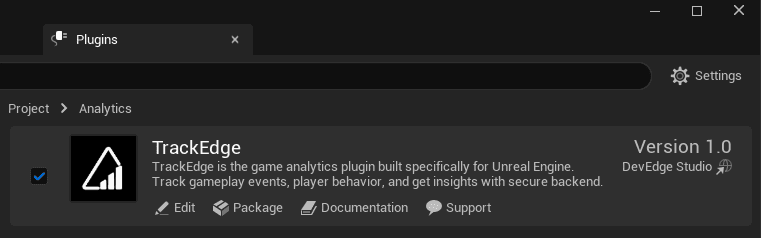
Step 3 - Configure TrackEdge
Open:
Edit
└── Project Settings
    └── Plugins
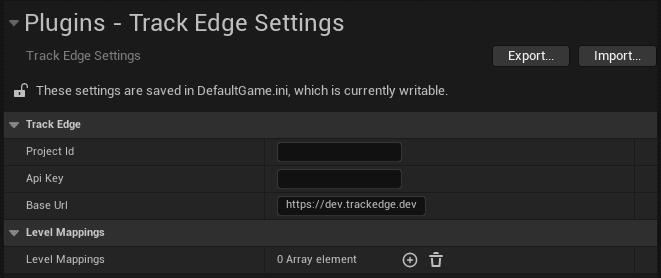
        └── TrackEdge
Enter your:
- Project ID
- API Key
- Base URL
The API Key is only used by editor tools such as Map Capture and Upload. It should never be exposed outside your development environment.
That's it!
TrackEdge is now installed and connected to your project. Continue to the next guide to configure your project settings and learn what each option does.
Next
➡️ Project Settings