
Map Capture
Capture and upload your playable maps for Session Replay.
Map Capture
Before Session Replay can visualize player movement, TrackEdge needs a map of your level.
The Map Capture tool automatically captures your playable area, divides it into tiles, and uploads everything to your TrackEdge project.
Before You Begin
Make sure your project meets the following requirements before capturing a map.
Level Bounds
Every level must contain a Level Bounds actor that covers the playable area.
TrackEdge uses the Level Bounds actor to determine the area that should be captured. If no Level Bounds actor is found, the capture process cannot begin.
Grid Size
For the best results, Grid Rows and Grid Columns should use the same value.
For example:
Grid Rows    = 10
Grid Columns = 10
Using a square grid ensures every tile has the same size and produces the most accurate Session Replay visualization.
Before capturing a map, make sure you have:
- A configured TrackEdge project
- A valid API Key
- A Level Bounds actor covering the playable area
- Grid Rows and Grid Columns set to the same value
- A level ready for capture
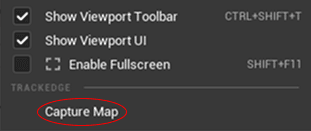
Step 1 - Open the Map Capture Tool
In Unreal Engine, open:
Window
└── TrackEdge
    └── Map Capture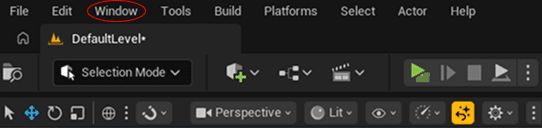
Step 2 - Configure the Capture
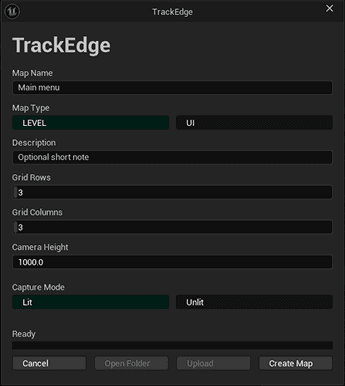
Configure the map before starting the capture.
| Setting | Description |
|---|---|
| Map Name | Name displayed in the TrackEdge Dashboard. |
| Map Type | Describes the gameplay level. |
| Grid Rows | Number of rows used to divide the map. |
| Grid Columns | Number of columns used to divide the map. |
| Camera Height | Height of the capture camera above the level. |
| Capture Mode | Lit/Unlit |
Higher grid values improve replay accuracy but increase capture time and upload size.
Step 3 - Capture the Map
Click Capture Map.
TrackEdge will automatically:
- Calculate the playable area from the Level Bounds actor.
- Capture every map tile.
- Save the generated images.
- Prepare the map for upload.
Step 4 - Upload the Map
After the capture finishes, click Upload Map.
TrackEdge uploads:
- Map information
- Captured tiles
- Grid layout
- Level metadata
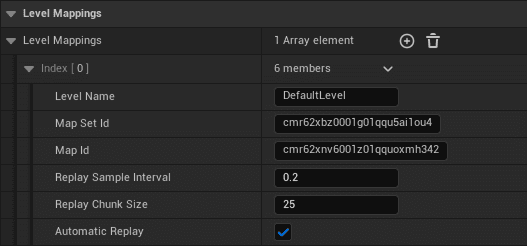
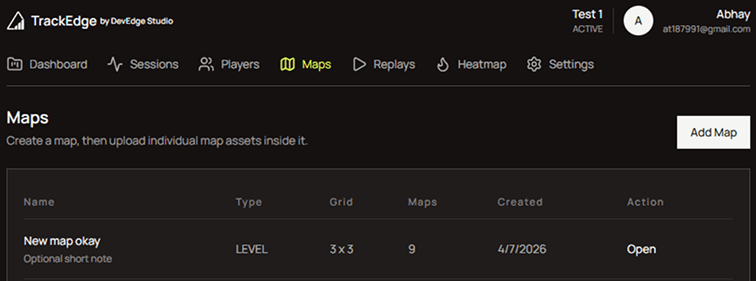
Once the upload completes, it will automatically configure level mapping and the map becomes available for Session Replay.
Troubleshooting
Capture does not start
Make sure the current level contains a Level Bounds actor.
Upload fails
Verify that:
- Project ID is correct.
- API Key is valid.
- Base URL is reachable.
- An internet connection is available.
Session Replay is not visible
Check that the current level has a valid Level Mapping configured in Project Settings.
Next
Your map is now ready to be used with Session Replay.
➡️ Session Replay